


Get Started with Google Analytics
Any type of company–from a small business, a sprawling franchise system, or even a content focused site– must track the online metric associated with their digital presence. Google offers free resources like Google Analytic (GA) and Search Console to help businesses understand the metrics behind their marketing efforts and improve their digital campaigns.
Providing valuable data to website owners, GA allows its users a better understanding of their own website and how their visitors interact with the site. Measuring the KPIs that are important to that business through GA enables website owners to identify which pages are most visited and what pages can be improved. With the granular level of data provided, businesses can improve their site and strengthen their SEO and various marketing efforts. Learn how to set up your business GA account with the guide below:
- Google Analytics Account Setup
- UA Tracking Code
- Properties and Views
- User Management
- Configure Search Console(Webmaster Tools)
- Linking Google Ads (AdWords)
- Goal Setup
How to Setup Google Analytics
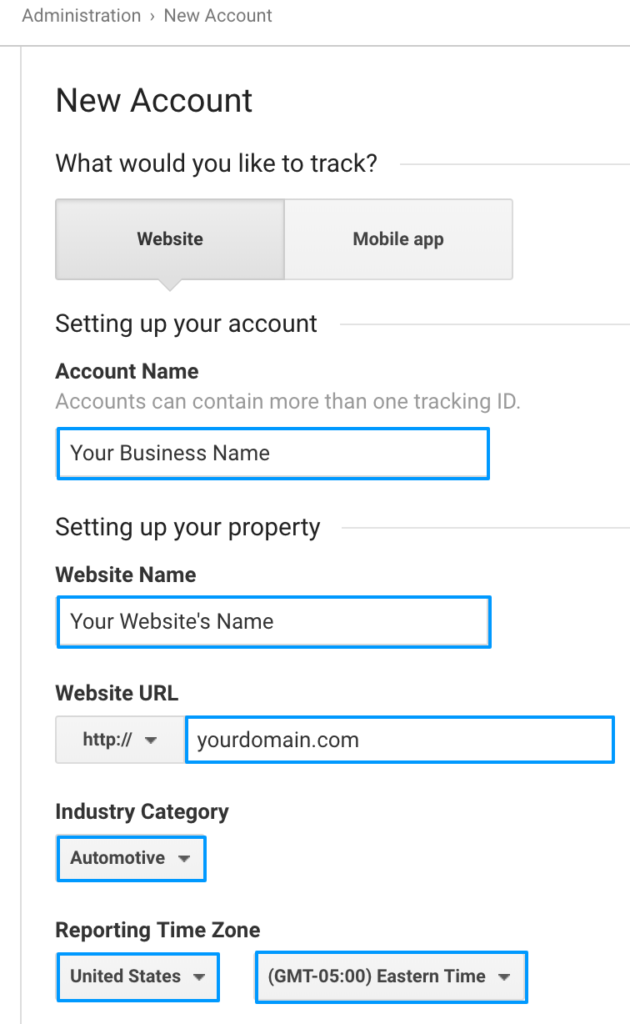
When setting up Google Analytics for the first time, you will first need to be logged into the Google account you plan to use for the site.
Begin by entering your basic account information. Enter the name of the business, its URL, time-zone, country, and the business category it falls into.
Once you reach this point in the process, there are a few different methods to continue by verifying your site
Google Analytics Tracking ID
Tracking Code
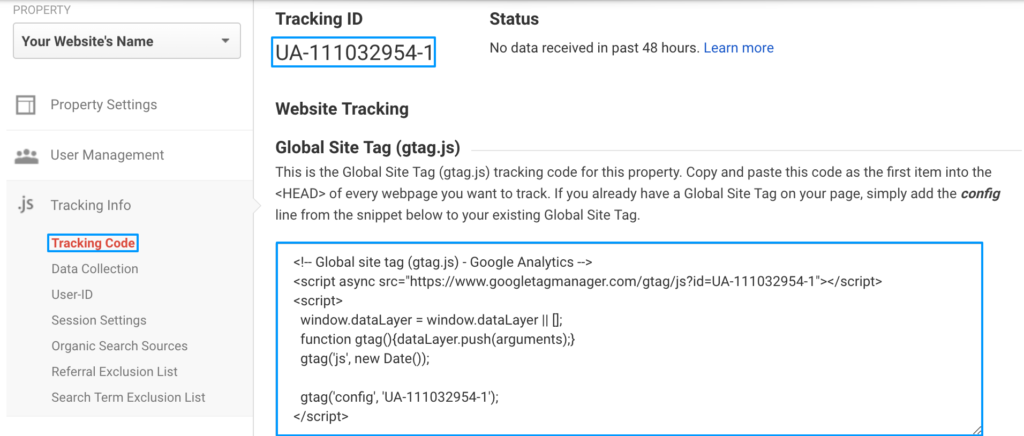
This is the original and generally the most traditional way to verify your site and the way that I have always recommended.
Simply click to copy the tracking code snippet by going to the “Admin” section of Google Analytics
Google Tag Manager
Another option to setting up your GA account is through Google Tag Manager. First, be sure to have a Tag Manager account.
- When setting up Analytics via tag manager, create tag and choose the Google Analytics tag template.
- Then choose the Universal Analytics option(UA-code).
- Configure your tag-create a name for it, usually suggested GA pageview
- Choose your firing triggers
After verifying your site, continue configuring the necessary aspects.
Filter Bot traffic: To avoid having skewed data, enable Bot Filtering. Check Exclude of hits from known bots and spiders as you continue your set up.
Configure Search Console (Webmaster Tools) to Google Analytics
Now that the foundation of Google Analytics account is set up, head over to Search Console, formally known as Webmaster Tools (WMT), to configure your property with your GA account.
If you don’t have Search Console property created for your site yet, having Google Analytics set up beforehand will make the WMT process and verification 10x times easier.
Open a separate tab to make it easier to switch back and forth.
Begin by going to Google Search Console and click Add a new property located in the right hand corner of the page. In the space provided, enter your desired URL and continue. This will bring you to a verification page with multiple authorization methods to choose from.
Though Google has its own preferred method that they recommend, choosing the Analytics verification will be the fastest, most non-invasive way of verifying your site as we’ve already set up the basics of Google Analytics.
Click Verify and both Google Analytics and Search Console will be connected.
https://cr-rail-assets.s3.amazonaws.com/upload/2017/12/Verify-Search-Console-GoogleAnalytics.webm
Properties and Views in Google Analytics
If you are only tracking one site, you have already retrieved your UA tracking code and applied it to the header of your site and the foundation of your Google Analytics account has been completed. However, if you’re looking to track data for multiple locations like a franchise, you will need to check out the additional setup steps below. Similarly, the next steps depend on how you have your websites set up.
Subdirectories and Properties
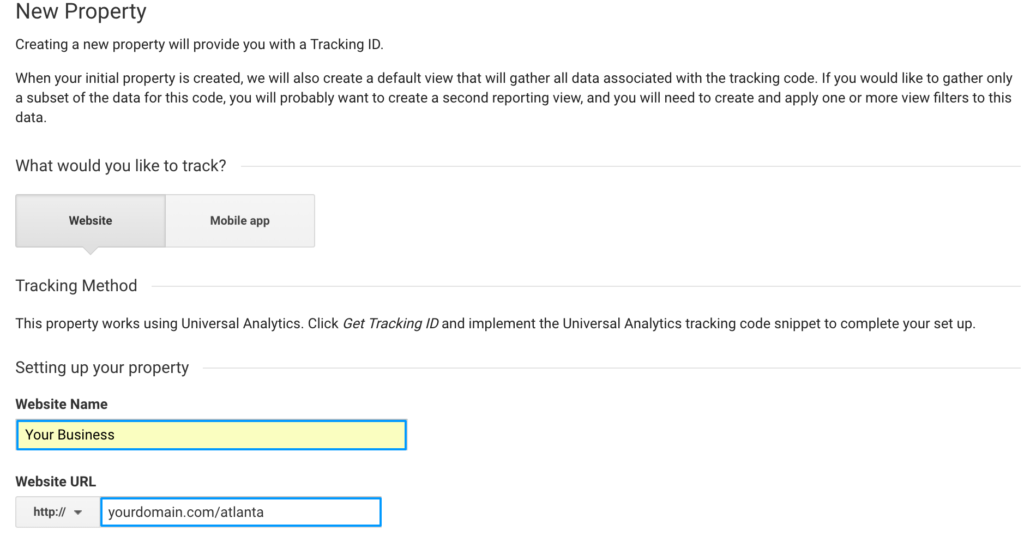
As subdirectories are viewed as folders within a main website and URLs are displayed as ‘yourdomain.com/location/’, they need to be set up as properties. For every location you are tracking, you will need to create a new property each specific location.
Located on the right of the Account tab in Admin, you’ll locate Properties section. Click the drop down menu and select Create New Property.
For each location, enter the specific URL for that location into the properties tab. After each one, take the new UA-code for that location and enter it into the admin of that locations backend.
Subdomain and Views
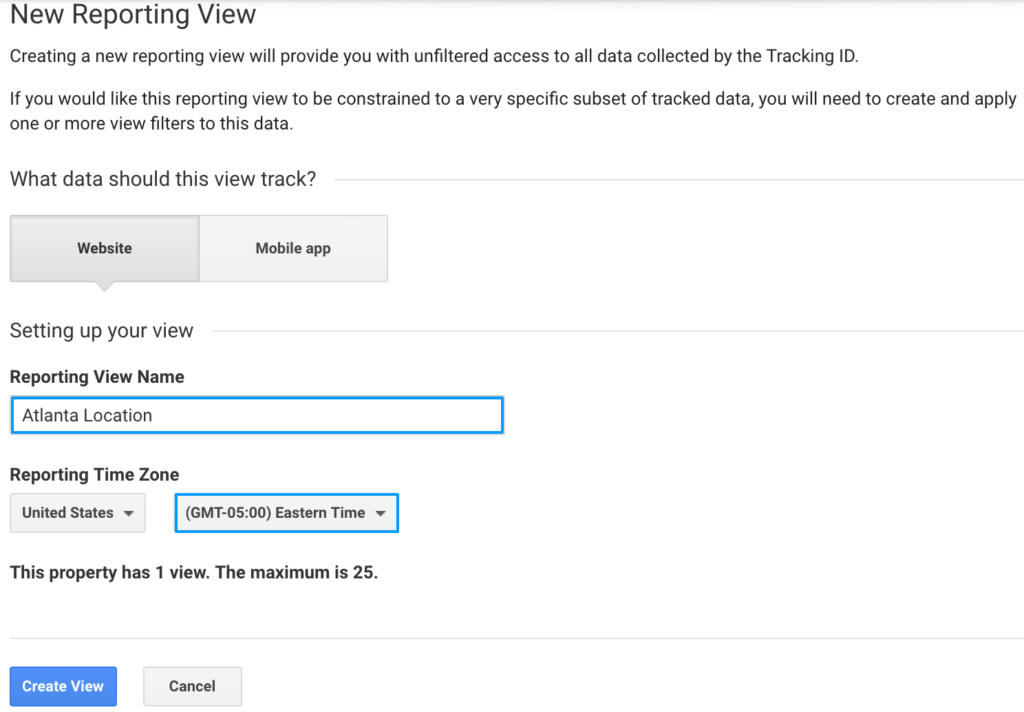
Subdomains run as a separate extension of a site, displayed as ‘location.yourdomain.com’ and will need to be set as views. Each location will share the same account UA code as the the main domain, but will have separate views to filter out each location.
To the right of Properties is the View section. Click Create New View and enter the location you are tracking and its time zone.
Afterward, you will need to apply a custom filter. Click on filters, select Create New Filter, and name the filter you are creating to indicate the location or subdomain.
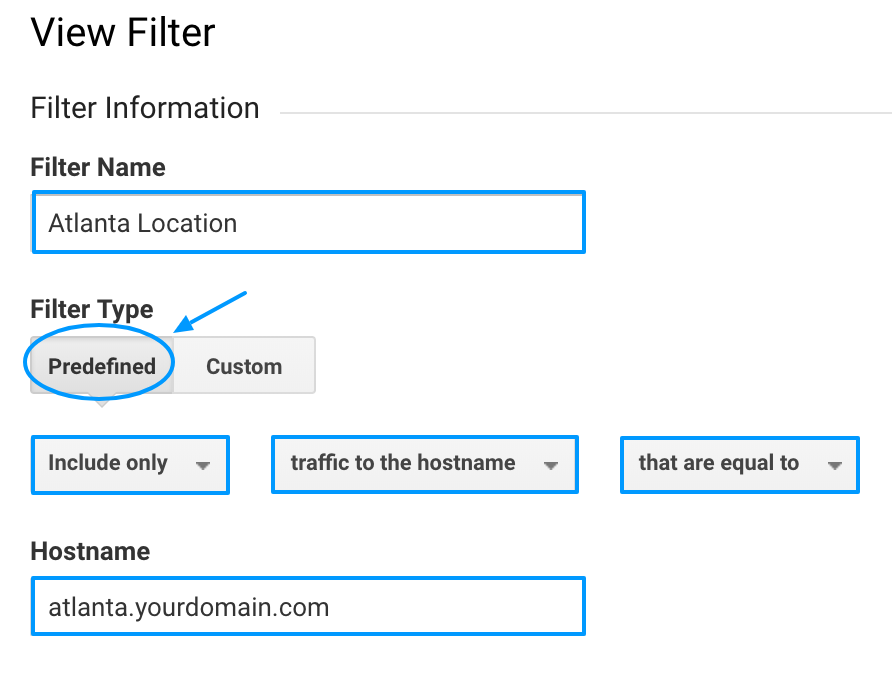
After choosing your filter’s name, select the Predefined Filter option below. From each drop menu, select Include only, traffic to hostname, and that are equal to. Then enter your hostname.
User Management in Google Analytics
After the website’s GA account has been set up, account owners can add and manage additional users to the account.
- Manage Users
- Edit
- Collaborate
- Read and Analyze
Depending on the level of access you want to give to others, you have a few options. User Management operates on three levels: Account, Properties, and Views. Not everyone needs to be added at the account level to have full access of account settings. By managing users, you can add, delete, and assign permissions to each user you share the Google Analytics account with.
When giving users permissions, you also have three options: Edit, Collaborate, and Read/Analyze.
Giving editing access will allow users who play a vital role in your implementation of GA to add/delete properties and views, create custom segments and filters, and set goals to track. However, many users won’t need this level of access.
Collaborative access allows users to create and share with others their own custom segments, dashboard, and reports.
For those who are only interested in view the data and adding second dimensions for reporting, there is Read and Analyze access. This permission is oftentimes reserved for those who periodically check campaign statistics or those who report these metrics.
Linking Google Ads (AdWords) to Analytics
Once you’ve finished setting up the properties and views your business needs, you can begin adding additional features to your Google Analytics account.
Located in the property column of Admin underneath Product linking, click + New Link Group. Select the Ads account you want to link to Google Analytics and continue.
If you are linking to various views, be sure to turn ON linking for each view within the property you plan to collect Google Ads data from. You can also select Enable Google Display Network Impression Reporting to include the Ads data in each view. Finally, you can link accounts.
Setting Up Goals in Google Analytics
What goals you are setting up depends on what KPIs are important to your business. Businesses that are wanting to track followers by collecting email information will typically use destination and event tracking goals while businesses who are focused on quality content rely on duration based goals to ensure the content is impactful and engaging for the visitor. Generally, most businesses focus on:
- Destination
- Duration
- Events
In the view column of the Admin section, click Goals. Select + New Goal and begin entering your specific goal needs.
Destination
Businesses usually set goals based on destination URLS to track form submissions like trial sign ups, PDF downloads, or any site submission that leads the visitor to a confirmation page. Destination based goals will typically send the visitor who submitted information on one page to another that confirms the information has been received. This is known as the destination URL and usually will appear as ‘http://www.yourdomain.com/thankyou.html’ to confirm the submission or action that took place.
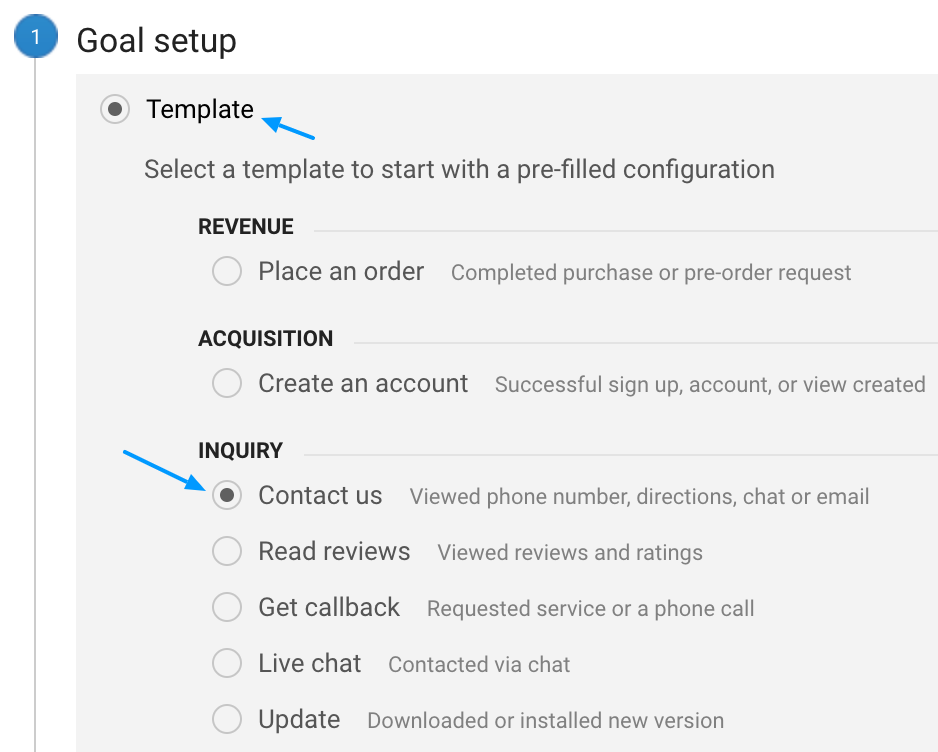
Choose Template for your Goal setup. This example is based off of a contact page so for inquiry, choose Contact us.
Name your goal based on the page it’s going to track. Then select Destination and continue.
For Goal details, make sure that the destination is equal to the destination URL. You can verify the goal and click save.
Duration
Duration goals will track a specific amount of time that visitors remain on a site. You can track for extended durations if certain pages are content heavy or for short durations if you’re tracking how fast a visitor found the information they needed on a community forum.
To set up a duration based goal, enter the name of the goal and select Visit Duration as the Goal Type.
Next, choose the condition and time duration you want to track, whether it’s Greater than or Less than the specific amount of time you’ve chosen. Save your goal.
Event Tracking
For event tracking, goals are set to track actions taken by the visitor, whether that be a PDF download, use of external links, or other various options.
To set up Event tracking, select the Template option again. Using sign ups as an example, choose Create an account as the acquisition.
For the goal description, enter the name of the event you are tracking and select Event for the type of goal.
In Goal details, make the category equal to Sign Up and the Action equal to Trial sign up.
Google Analytics is powerful tool to be taken advantage of. Integrating your site with Google’s free resources on top of call tracking will help give you a better understanding of the way users enter and interact with your site and allow you to improve their experience.
Learn more about how Google Analytics Call Dashboard and call analytics can improve your business–request your no obligation demo of CallRail, or go ahead and start your 14 Day Free Trial, no credit card needed.


