What’s the most common action visitors take on your website?
Clicking.
But not all clicks are created equal. A click on a “Free Trial” signup button means something different for your business than a click on the “Contact Support” button.
Fortunately, Google Analytics allows you to track clicks on your website to a certain degree, using Google Tag manager. The process is a bit different in the new version of Analytics, so here’s a breakdown on exactly how to track button click events in GA4.
By the way, if you are still new to GA4, be sure to check out our full guide to GA4 Training and Resource hub.
What are click events in Google Analytics 4 and why are they important?
In GA4, a click event refers to any time a visitor on your website clicks on a button or other clickable element. Clicks are just one of the many types of events you can track in GA4, but they may be one of the most important to your business.
Consider what you want your customers to do when they arrive at your website. Do you want them to request a quote? Fill out a form? Start a free trial? Sign up for your mailing list? Purchase a product or subscription?
No matter what action you want them to take, it’s likely there are a few buttons or custom links that help move them along the customer journey. With click events, you can see detailed information about how many times a button was clicked, and when in the customer journey users are tapping buttons.
In other words, click events are a vital part of tracking conversions in GA4, but this data can also help you refine your marketing with A/B testing. For example, you could try the text “Book a Demo'' on your primary CTA button for two months, then switch it to “Request a Callback” and see which phrasing brings more clicks.
Going deeper than clicks in GA4
While there’s no doubt value in tracking custom link clicks in GA4 and Google Tag Manager, there’s still only a limited amount of information you can get from this platform.
Beyond the number of clicks, and what pages visitors went to before or after they clicked, you won’t be able to extract much detailed or insightful information about custom link clicks.
That is, unless you use software like CallRail, which allows you to collect detailed datapoints from the spectrum of your marketing efforts, and bring it all together in one powerful dashboard.
Not only does CallRail integrate with GA4 to bring you all the same data, but you can also use call tracking and form tracking to get insights about customers interacting with your business online and offline.
Sign up for a free trial to see how you can use CallRail to learn more about your and enhance your marketing ROI. Sign up for a free trial to learn more.
How To Track Custom Link Clicks with Google Analytics 4 and Google Tag Manager
Getting custom link tracking set up in GA4 takes a few steps, but it’s not terribly difficult if you’re somewhat familiar with GA4 and Google Tag Manager. Here’s a breakdown of how to do it, step by step:
Part 1: Set up link click events in tag manager
The first step to tracking clicks in GA4 will be to set up a custom click event for the button or URL you want to track. This process takes place in Google Tag manager, so open that up on the property you’re working on, and follow this process:
Option 1. Create a GA4 event tag in Google Tag Manager
Before getting started you want to make sure this event is not already set up In Google Tag Manager. You’ll do this by opening up Preview mode by clicking the “Preview” button in the upper-right corner. This should open up a preview version of your site. Once there, click any link on your site.
Look in the sidebar in preview mode to see if there is a “Link Click '' event tracked, associated with the link you just clicked. If so, great! You’re one step ahead can move on to step 2 of this section.
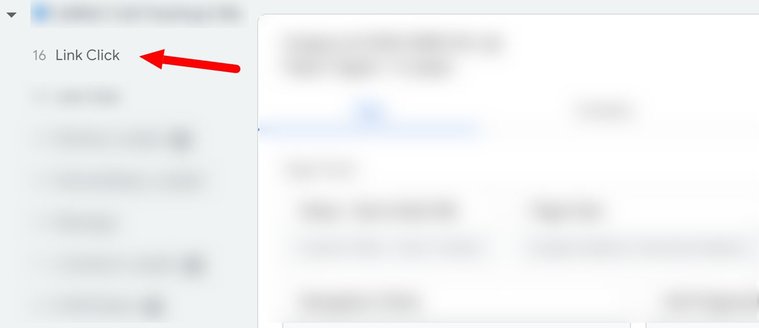
If not, then you’ll need to create one. Follow the steps below:
1. Create a new tag with a GA4 event configuration and select your already existing configuration tag. If one has not been set up, you can enter your G-ID manually. Copy and paste your G-ID which can be found in the Data Streams section of the Admin in GA4. Next you’ll need to select your event name by clicking on the Variables button next to the field. Here you’ll select the recommended event name titled “undefined”.
Once completed, click the Events Parameter drop-down and add 2 rows. This will be the specific data that is pulled from this event firing. In this case, you want your configuration to look below:
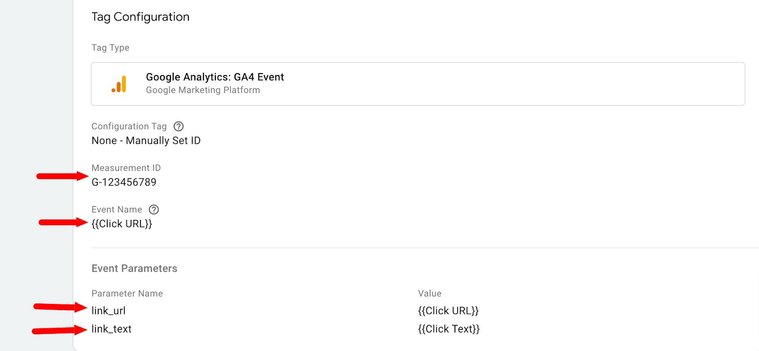
Step 2: Create a new trigger. Choose Just Links trigger type, set it to All Links, and save it. This will enable you to track link clicks properly. From there, click on Variables in the sidebar and select Configure in the Built-in Variables section, and tick the box to enable all Click-related variables. Then, go back up to step one and check out preview mode again to make sure it’s being tracked. Phew! Now you can move on to step 2 of this section. Don’t forget to publish your changes.
Option 2. Set up a custom click event for specific URL link clicks
If you want to track a specific URL, you’ll need to set up a custom event to track specific link clicks. You’ll follow the same instructions above, with the exception of your trigger configuration (more on that below). If you don’t know how to set up a custom event to track link clicks, don’t worry, we’ve got you covered:
1. Create a new tag in Google Tag manager
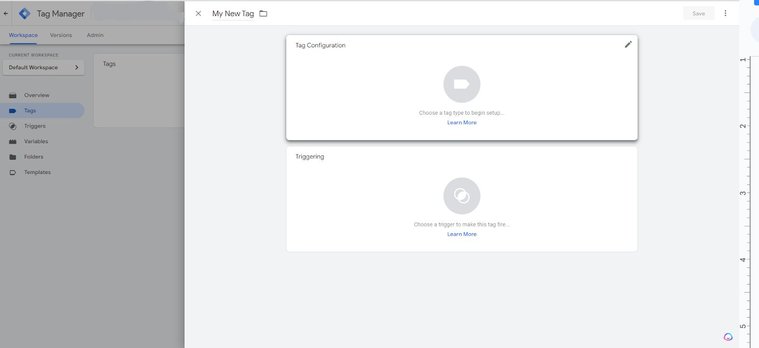
2. Select your tag configuration (GA4 Events)
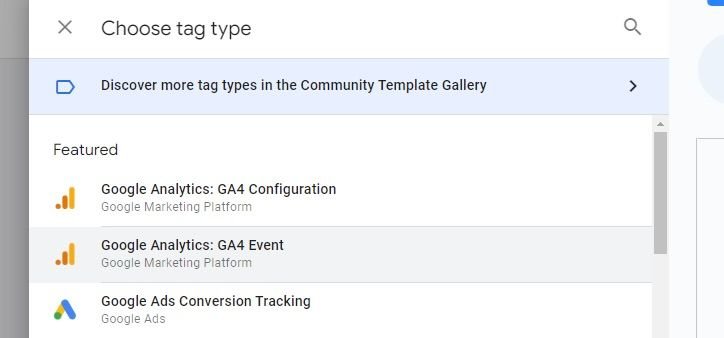
3. While in trigger configuration, create a new trigger type in the upper right hand corner. Select the “Just Links” trigger type.

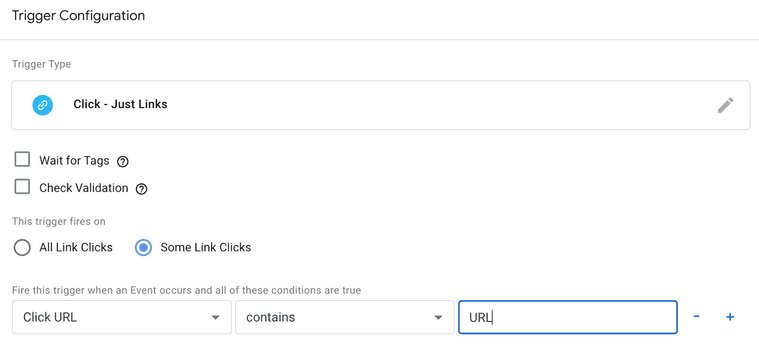
4. Next, you’ll select Some Link Clicks and set the conditions for firing this trigger. To track clicks to a particular URL, your conditions should be set like this:
- Click URL | Contains | [Enter desired URL here]
Part 2: Register your recently created event parameters as custom dimensions in GA4
With everything set up properly in Google Tag Manager, the next step is to connect things in GA4 by setting up a custom dimension for the event parameters we created.

Let’s head over to GA4 admin, go to custom definitions, and create a custom dimension. In this case, we have to create two separate dimensions, one for link_url and one for link_text.
As you do this, you’ll need to fill in a number of different pieces of information. Here’s a breakdown:
Dimension Name - You can give your dimension any name you like, but make sure it’s relevant to the event you’re creating.
Scope - In this case, the scope is an event, so simply choose that option.
Description - Once again, this can be anything you choose. It may be best to create a description that helps others in your business understand what the custom dimension is all about.
Event Parameter - Here, you’ll need to use the exact name you entered as the parameter in the GTM tag. In the example above, our parameter in the GTM tag was link_url, so we would enter that exact phrase (underscore and everything) here. Don’t worry if the autocomplete feature of that field does not show your parameter yet. Just enter it and save the dimension. Do this again for link_text, and hit save.
Test setup in GA4 Debug view
- Activate GTM preview to automatically activate debug_mode in GA4
- Select correct debug device
- Click Parameter to see data received by GA4
Track Event Clicks Automatically with Enhanced Measurement Events
What are enhanced measurement events?
Enhanced Measurement is a set of tools that automatically track and gather more information about user actions for marketers and analysts. In the previous version of Google Analytics (called Universal Analytics), we only had information about page views. If we wanted to track other actions, we had to customize our setup.
But now, with Enhanced Measurement, we can track additional actions without needing to configure Google Tag Manager or edit our website's code. However, it's important to note that some of the events provided by Enhanced Measurement may have limitations, and we might need to make some adjustments to get the desired results (more details on that will be discussed later).
When setting up a web data stream in Google Analytics 4, we have the option to enable Enhanced Measurement. It is designed to help marketers include as many events as possible in their reports without having to work with developers or configure Google Tag Manager.
To access this feature, go to the Admin section, then select Data Streams, and choose the web data stream you're working with. In the window that appears, you'll find a section called Enhanced Measurement.
What events can be tracked by activating enhanced measurement?
By default, this feature is enabled and will automatically track the following events:
- Page view (event name: page_view)
- Scroll (event name: scroll)
- Outbound link click (event name: click with the parameter outbound: true)
- Site search (event name: view_search_results)
- Video Engagement (events: video_start, video_progress, video_complete)
- File Download (event name: file_download)
- Form interactions (event name: form_start, form_submit)
Integrate CallRail with Google Analytics
Let no click nor call go untraced. Get the full picture of your marketing with this powerful analytics duo.


